
Collet: Identify the Type, Match the Shank and Assemble It
Choose a collet by system and measured shank diameter, understand ER clamping ranges, then assemble and check the holder before cutting.
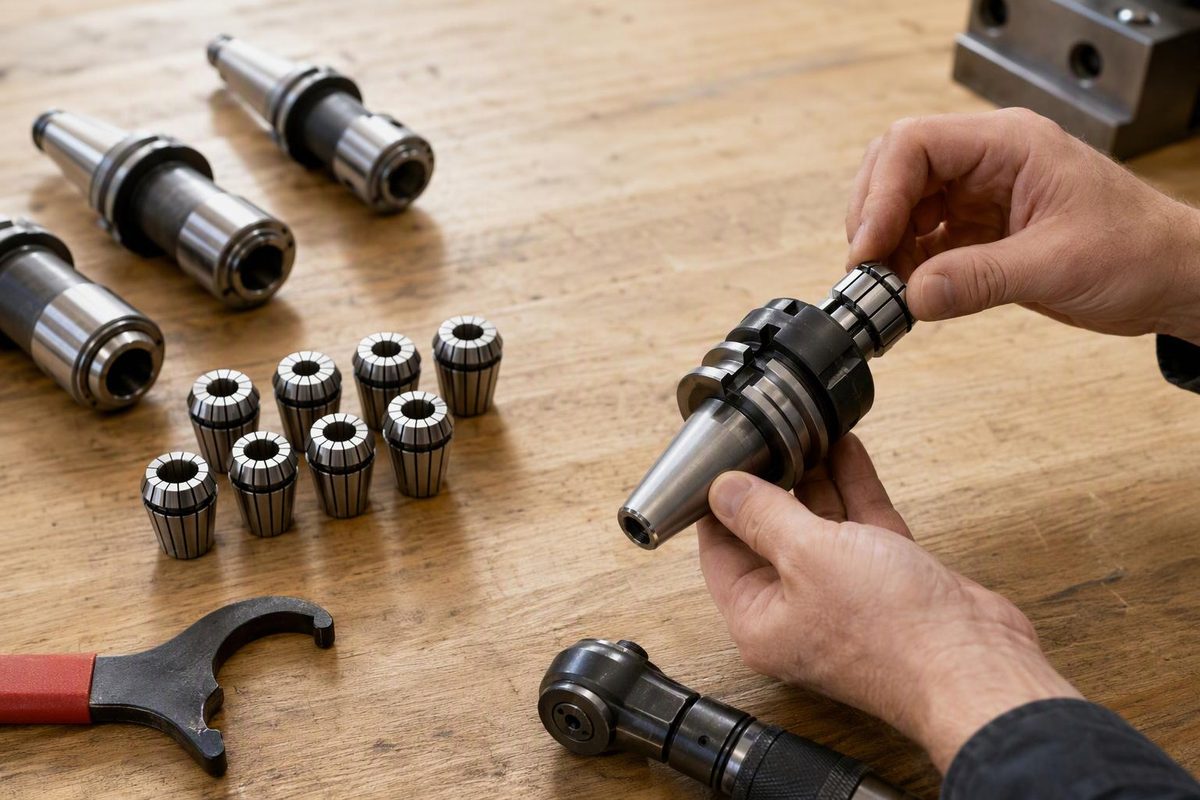
A collet is a slotted clamping sleeve that closes around a tool shank or workpiece. The collet supplies the gripping surface; its matching holder and tightening mechanism apply the clamping force. Toolholding collets locate cutters, while workholding collets hold parts for machining. Centaur’s technical guide describes both uses.
For a replacement, two things must match: the collet system must fit the holder, and the gripping diameter must fit what you put inside it. A listing that says only “1/4-inch collet” does not establish compatibility.
Identify the system first
Common garage-shop applications include:
- ER: Used in suitable collet chucks for drilling, milling, reaming and other toolholding operations. The assembly has a holder, removable collet and clamping nut.
- R8: Collets for R8-equipped milling machines.
- 5C: A workholding style normally used in lathes.
- Router collets: Hold router-bit shanks; check the router’s model-specific replacement information rather than assuming a matching bore means a matching part.
These applications are described in Centaur’s technical guide and its R8 and other collet-set overview.
Record the machine model, holder markings and collet markings before ordering. If the markings are missing, measure the loose collet’s overall length and maximum outside diameter, and record its taper, slots and any extraction groove. Compare that record with the supplier’s drawing—not just a product photograph. Keep the nut’s markings too if it also needs replacement. The replacement-part identification checklist provides a useful record format.
ER16 or ER32 names the series, not the diameter of the cutter being gripped. One series contains multiple bore sizes. For example, Centaur lists ER16 collets with ranges including 6–5 mm and 7–6 mm. Source: ER product tables.
Match the measured shank to the clamping range
Measure the clean, straight section that will actually sit inside the collet. For a cutter, that means its shank—not the cutting diameter. Use the caliper-versus-micrometer guide when choosing an instrument for that check.
Many ordinary ER collets can collapse through a published range, commonly 1 mm; smaller series and special versions may differ. They are not intended to expand around an oversized shank. Centaur recommends using collets at their nominal, largest diameter where possible and explicitly warns against forcing in a larger tool. Source: ER care and use.
For example, 1/4 inch is 6.35 mm, not 6 mm:
- A collet rated 6–5 mm is too small.
- A standard ER16 collet rated 7–6 mm includes 6.35 mm.
- An appropriate true 1/4-inch collet provides a nominal-size option.
Centaur publishes both the metric ranges and a 1/4-inch ER16 option in its ER tables. Confirm the range for the actual part you are buying. Do not apply ordinary ER collapse allowances to R8, 5C, router or special-purpose collets. Centaur’s sealed coolant collets, for instance, are listed there as exact-size products without a collapse range.
Assemble an ordinary ER collet in this order
Use the machine’s safe setup procedure and isolate power before handling tooling. Have the correct collet, nut, wrench and manufacturer’s tightening instructions ready.
- Clean and inspect. Remove debris from the holder seat, collet bore, outside surfaces and nut. Stop if parts are cracked or visibly damaged.
- Snap the collet into the loose nut first. Insert it at an angle so its extraction groove engages the nut’s eccentric extractor ring, then rotate it into position.
- Start the nut-and-collet assembly on the holder by hand. Do not put the collet in the holder first and screw the nut over it.
- Insert the tool’s straight shank. Meet the specified engagement length; do not clamp on the flutes. Centaur recommends full bore-length insertion where possible and warns that less than two-thirds engagement may distort its ER collet.
- Tighten to the applicable specification. Follow the instructions for that holder and nut, including any specified lubrication condition. Remove the wrench before operation.
The snap-in sequence is documented in Machineryhouse’s ER mounting instructions and corroborated by Centaur’s assembly guidance. Centaur also warns that overtightening can reduce holding strength and accuracy; more force is not a repair for the wrong size or poor seating.
Check the assembled tool—not just the label
Where runout matters, use a dial indicator on the straight shank or a suitable test pin. Keep power isolated and follow the machine’s safe procedure for turning the spindle by hand. At a fixed axial measurement location, record the difference between the highest and lowest readings over one revolution—the total indicator reading, or TIR. Source: Centaur’s TIR definition.
A collet’s advertised runout is not automatically the result at the installed cutter; the holder, nut and assembly condition also matter. Source: Centaur’s accuracy guidance.
If the result is unsuitable for the job, disassemble, clean and recheck the fit and seating. Do not keep tightening to chase an indicator reading. After machining, measure the finished feature: correct collet selection is a setup requirement, not proof that the hole or part meets its drawing.