
Tap Wrench: Choose by Square-Shank Fit and Clearance
Choose a straight, T-handle or ratcheting tap wrench by square-shank capacity, handle clearance and secure grip before cutting threads.
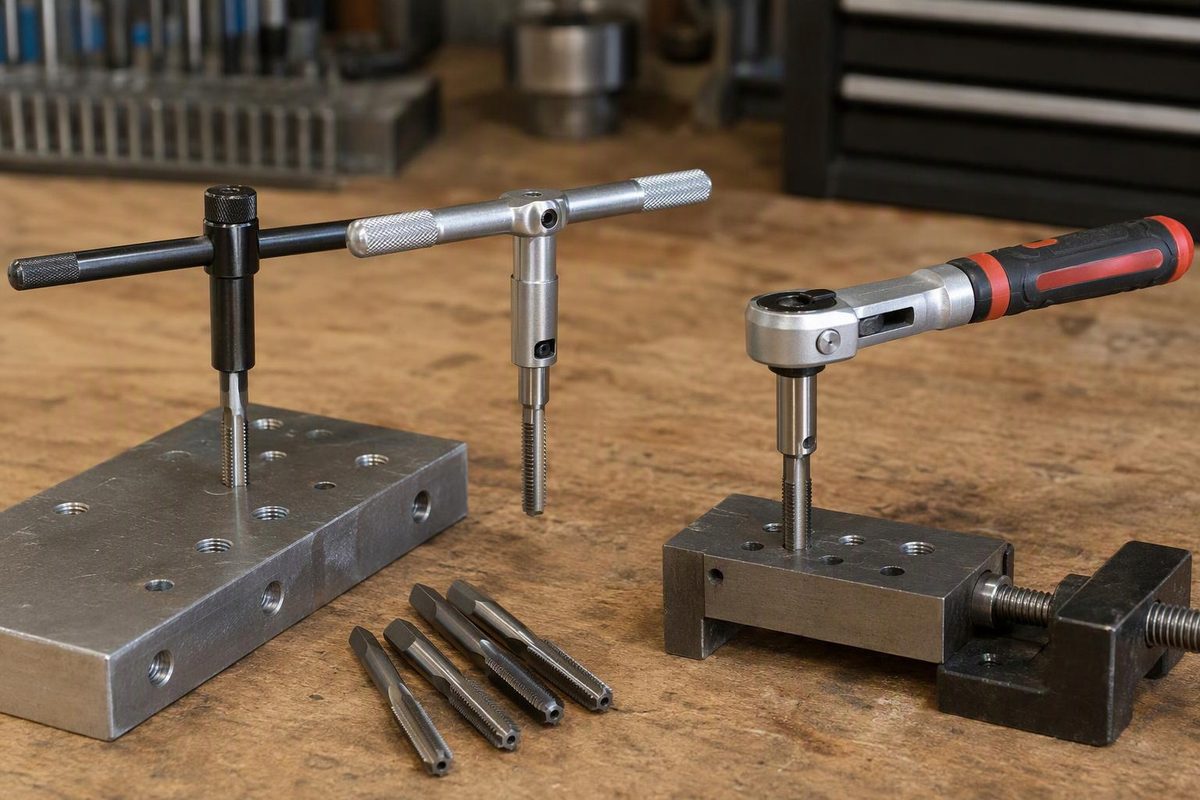
A tap wrench holds and turns a tap by hand; the tap makes the internal thread. Choose the wrench by the tap’s square drive end, its stated tap capacity and the space around the hole—not just by the thread diameter printed on the tap.
For an exposed hole in a plate or bracket, a straight-handle wrench is a useful starting choice. A T-handle suits work where a long bar is awkward. A ratcheting T-handle helps when nearby parts limit handle swing. In every case, secure grip and unobstructed movement come first.
Match the square, not just the thread size
Tap diameter and square-shank size are different dimensions. Manufacturers may list both, and those ranges are not interchangeable.
For example, the Starrett 93C T-handle wrench lists:
- Tap-size capacity: 1/4–1/2 inch.
- Square-shank capacity: 3/16–5/16 inch.
- Body length: 3-1/2 inches.
The 1/4–1/2-inch range is not the jaw opening. It describes the listed tap sizes; the smaller square-shank range describes the drive end the jaws accept.
Before buying, record the tap’s full thread marking and measure across two opposite flats of its square, not across the corners or around the round shank. Compare that measurement with the wrench’s square-shank specification, and check the stated tap-size range too. If the listing gives only a broad tap range, obtain the jaw specification or try the actual tap before relying on the fit.
Which type suits the access?
| Wrench type | Practical choice for | What to check |
|---|---|---|
| Straight-handle, adjustable bar | An exposed hole with room for hands on both sides | Both handles must clear the vise, plate edges and adjacent parts throughout the turn. |
| Plain T-handle | Work where a long bar is awkward | Check body height above the tap as well as crossbar clearance. |
| Ratcheting T-handle | A hole beside an obstruction that limits handle swing | Check that the available swing actually operates the ratchet, and that reverse is accessible. |
A straight-handle wrench gives you two ends to turn together. Use that arrangement to rotate around the tap’s axis rather than pulling sideways on one handle. As a dimensional example, the Starrett 91B has a listed 9-inch body length and accepts 5/32–9/32-inch square shanks—quite a different clearance envelope from the 93C.
Some T-handles have sliding crossbars. Starrett specifies a frictionally held sliding handle on the 93C, allowing the bar to be repositioned when an obstruction is close. That helps with clearance, but does not make the wrench an alignment guide.
A ratcheting version lets you reset the handle without repeatedly releasing the tap. General Tools’ catalog describes reversible ratchet models that can also be locked for non-ratcheting use, with sliding T-handles. Those are useful features to look for; do not assume every ratcheting wrench has all three modes. Choose the ratchet for access, not as permission to force a tight tap.
Check the grip before cutting
With the work clamped and eye protection on:
- Clean the square and jaws. Inspect for chips, damaged flats or chipped gripping surfaces.
- Seat the square in the intended gripping area. Tighten the wrench using its sleeve or jaw-adjusting mechanism so the tap is held securely.
- Check for movement by hand. If the tap rocks or slips within the jaws, reseat it and confirm capacity before applying cutting load.
- Dry-check the handle path. Allow for your fingers as well as the tool. A crossbar that clears the bracket but traps your hand is not a workable fit.
Do not compensate for a mismatched shank by excessive tightening. Starrett warns for its 91-series wrench that excessive pressure when gripping round shanks can break the movable V-jaw. For a tap with a square drive end, use that square rather than treating the round shank as a substitute.
Once the wrench fits, settle the hole and cutting setup separately: use the drill and tap guide chart for hole sizing and the tap-and-die guide for preparation, cutting and inspection. A suitable wrench solves the holding and access problem; it does not correct an undersized hole or an unsuitable tap.