
Spring Nut: Identify the Type, Check Fit and Install It
Identify clip-on and strut-channel spring nuts, check panel thickness or channel fit, and install them without forcing the screw or guessing torque.
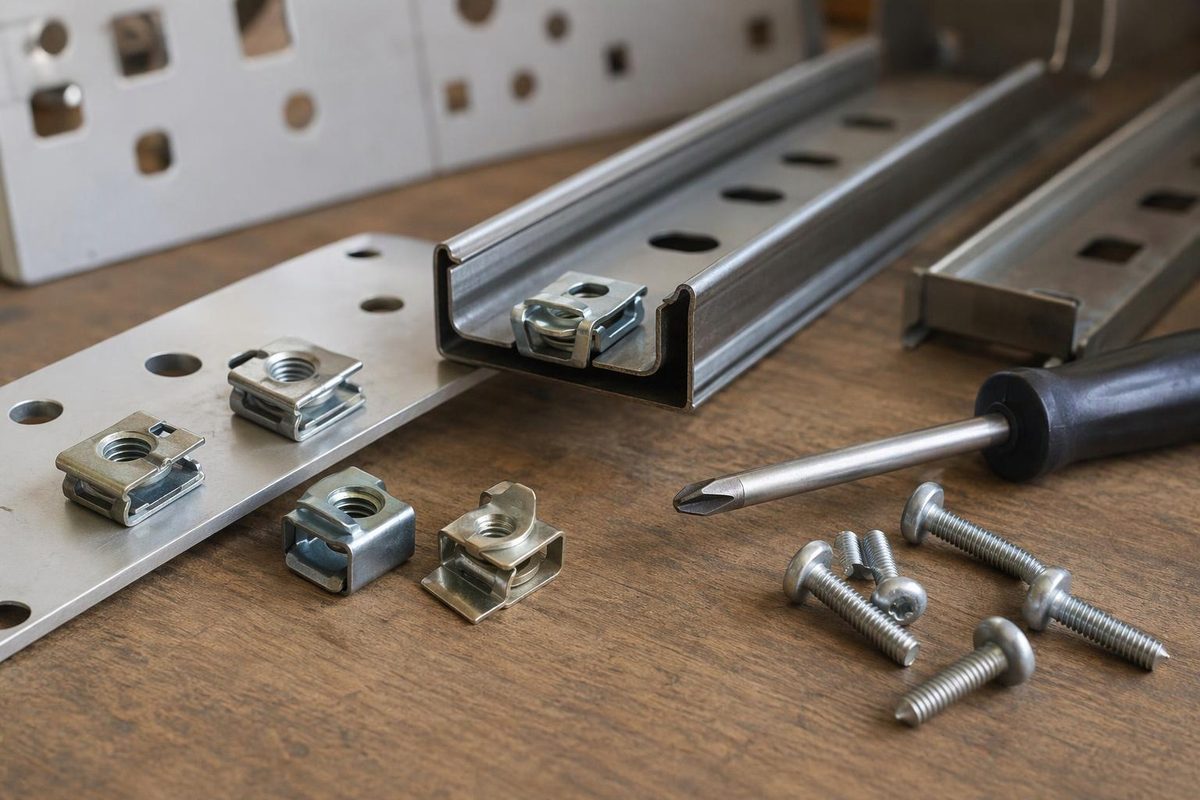
“Spring nut” can mean a clip-on nut for a panel or a threaded channel nut with an attached spring. They solve different fastening problems. Before buying a replacement, identify where the nut seats, then match the screw and the supporting material.
For a removable sheet-metal cover, the important dimensions are panel thickness, hole diameter and reach from the edge. For a bracket on strut channel, the important match is the channel profile and the nut’s listed compatibility—not merely its thread size.
Identify what you have
| Appearance | Type | What to match |
|---|---|---|
| Folded U-shaped clip that slips over a panel edge | Clip-on spring nut or U-type speed nut | Screw specification, panel-thickness range, hole size and edge-to-hole geometry |
| Clip with a projecting threaded barrel | Barrel U-nut | Full thread designation, panel fit and barrel clearance |
| Thick rectangular threaded nut with grooves and an attached coil spring | Strut-channel spring nut | Channel series, nut/spring combination, thread and finish |
U-type speed nuts combine a nut with a spring clip. Depending on the part, they accept either machine screws or sheet-metal screws; these are not interchangeable simply because their diameters look similar. Huyett’s U-nut guidance describes both arrangements.
A barrel U-nut is another clip-on construction. ARaymond Tinnerman lists both free-spinning and prevailing-torque barrels, so resistance while turning the screw does not by itself prove that the thread is damaged. Check the specified version. Barrel U-nut catalog
Flat speed nuts also exist: a thin plate without the folded edge clip. Do not replace one with a U-nut unless the assembly has suitable edge access and clearance. Flat speed-nut catalog
Choose a clip-on nut from the finished panel
Measure the actual part at the clip location, rather than relying only on the sheet’s nominal gauge. Record:
- Panel thickness: the thickness gripped by the clip, including the finished surface.
- Hole diameter: use the nut maker’s panel-hole requirement, not a tap-drill size.
- Edge-to-hole-center distance: compare it with the drawing’s throat or reach dimension.
- Available space: check clip width, length and any barrel projection against bends and nearby parts.
- Screw designation: match diameter, pitch and screw type.
- Material and finish: select for the assembly’s requirements and exposure; Huyett lists several materials and protective finishes in its selection guidance.
Keep the clip’s own material thickness separate from its panel-thickness range. For example, Huyett’s EFSN-C08115-1024-4 listing, checked November 6, 2026, gives a #10-24 thread, 0.045–0.062-inch panel range, 0.022-inch clip thickness and 0.250-inch hole diameter. Those are four different specifications, not alternative ways of describing its size. The listing is an example, not a universal #10 spring-nut pattern. Product drawing and specifications
Install and check
- Remove drilling burrs and inspect the edge and hole for damage.
- Slide the clip onto the intended panel edge, positioning its screw-receiving feature over the hole. Follow the part drawing for orientation.
- Offer up the mating panel. Check that the screw path is aligned before tightening.
- Start the correct screw with a hand tool. Stop if it enters crooked, pushes the clip away or immediately binds unexpectedly.
- Tighten to the assembly specification or the nut maker’s applicable joint specification, then inspect for panel distortion and clip movement. Do not substitute a generic torque value based only on screw size.
Do not spread an undersized clip with pliers to make it fit thicker stock. Select a part whose stated range includes the measured panel. On disassembly, follow any assembly-specific replacement requirement. Otherwise, reuse a clip only if its shape, finish, threads and spring tension remain sound; this is Huyett’s stated reuse criterion in its U-nut guidance.
Choose and install a strut-channel spring nut
Identify the channel series first. Nuts with the same thread can have different listed channel combinations: Unistrut’s selection chart separates spring-nut families by the channels they fit. Choose the listed combination and an appropriate material/finish rather than assuming that any nut sold for “strut” will work. Unistrut nuts and hardware catalog
For the conventional Unistrut connection:
- Insert the nut through the channel opening with the spring inside the channel.
- Turn it 90 degrees clockwise so its grooves align with the channel’s inturned edges.
- Check that both edges are seated in the grooves, then position the fitting.
- Start the bolt through the fitting into the nut. Verify usable thread engagement and clearance so the bolt does not bottom before clamping.
- Tighten using the applicable system specification.
Unistrut explains that the spring holds the nut in position during assembly; tightening engages the serrated nut teeth with the channel edges. Spring pressure alone is not the finished connection. Unistrut connection instructions
For a load-bearing bracket, verify the specified nut/channel combination’s allowable pull-out and slip loads at the stated installation torque, as well as the fitting and channel capacity. Unistrut publishes separate pull-out and slip values for different channel and nut combinations in its channel-nut load tables. A bolt that threads in successfully is only a fit check—not a load rating. Keep general bolt-torque guidance separate from the spring nut’s own installation specification.