
Self-Centering Drill Bit: Locate Pilot Holes Through Hardware
Choose a self-centering hinge bit by pilot diameter and nose fit, then clamp, drill and check hardware alignment before finishing the assembly.
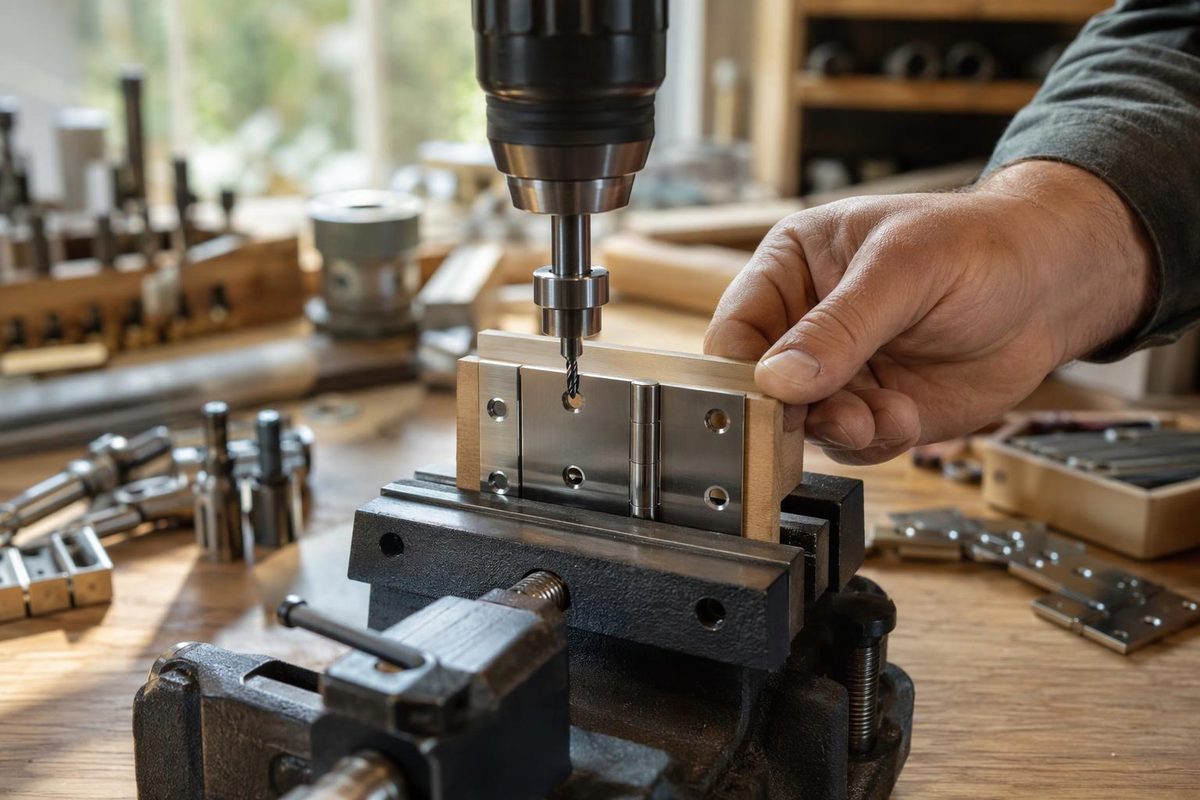
A self-centering drill bit—the spring-loaded hinge-bit type—uses an existing hardware hole to locate a pilot hole in the part underneath. It is useful when mounting a hinge, latch plate or countersunk bracket to a wooden box or base: position the hardware first, then drill through it rather than transferring each center by eye.
The locating feature is the guide’s beveled nose. It seats in the hardware’s countersink, while the spring-loaded mechanism allows the drill to advance into the wood. Trend describes this design specifically for countersunk hardware and drilling in hard and softwoods.
It centers relative to the hardware, not your drawing. A misplaced hinge produces misplaced pilot holes even when the bit works correctly.
Choose by pilot diameter and nose fit
Check these separately before buying or drilling:
- Pilot diameter: Match the cutting drill to the screw and receiving material—not to the diameter of the hole through the hardware. Use the pilot-hole selection guide for that decision.
- Nose fit: With power disconnected, seat the guide in the actual hardware. It should locate symmetrically without dropping through the opening or rocking on one edge. A slot does not establish a unique center along its length; do not assume a hinge bit will locate it.
- Reach and depth: Check that the chuck clears the hardware and that the tool can produce the required depth below it. Check the receiving part’s thickness so you do not unintentionally drill through. Do not assume full spring travel equals the depth your screw needs.
- Serviceability: Prefer a design with a removable barrel and available replacement drills if it will see regular use.
Read screw-size recommendations with their material conditions. For example, Snappy’s 9/64-inch bit contains an HSS twist drill and is recommended for #10 screws in hardwood or #12 in softwood. That is a product-specific wood-pilot recommendation, not a clearance-hole or tap-drill specification.
Metal hardware can serve as the locating template while the bit cuts wood underneath. That does not establish that the complete hinge-bit assembly is suitable for drilling steel. For a metal receiving part, use a tool and locating method intended for that material; do not infer suitability from “HSS” alone.
Clamp, drill and verify
- Set the hardware position. Establish the hinge edge, latch alignment or bracket location from your layout. Check moving-part clearance before making holes. Clamp the hardware and receiving part so neither can shift under drilling pressure. Wear appropriate eye, hearing and respiratory protection; these precautions are included in Trend’s accessory safety instructions.
- Prove the setup on scrap. Use the same material and, where practical, the same hardware. Check pilot diameter, usable drilling depth and screw seating. If your bit allows depth adjustment, follow its instructions and verify the result rather than trusting the factory setting.
- Seat the nose before starting. Hold the drill perpendicular to the mounting face, with the guide centered in the countersink. Apply steady axial pressure so the mechanism advances the cutter. Do not lean the drill sideways to make the nose fit.
- Withdraw and clear chips. Stop if feed becomes difficult or the sleeve fails to return. Disconnect power before dismantling or cleaning the tool. Snappy’s catalog specifies that its knurled barrel unscrews to clear chips from the body.
- Check before installing screws. If the bit produces full-depth pilots, drill one and start its screw without fully tightening. Recheck hardware position and movement, keeping the clamp in place while drilling the remaining pilots. If the tool only starts the holes, keep the hardware clamped until all those short pilots are drilled. Then remove the hardware and deepen them with the correct ordinary drill and depth control before installing any screws. Refit the hardware and check alignment before tightening.
If the screw does not seat correctly
- The hardware moves as the screw tightens: Recheck pilot location and whether the hardware shifted during drilling. Do not use screw pressure to pull a mislocated fitting into place.
- The nose rocks or slides: Recheck hole shape, countersink condition and guide size. Stop rather than forcing an unsuitable guide into the opening.
- The head remains proud: Check screw-head compatibility, pilot depth and debris. Centering the pilot does not correct a mismatched head or a shallow hole.
For a hinged assembly, finish by checking that the heads seat properly and the moving part travels through its intended range without binding.